"Grove" Archery Stands

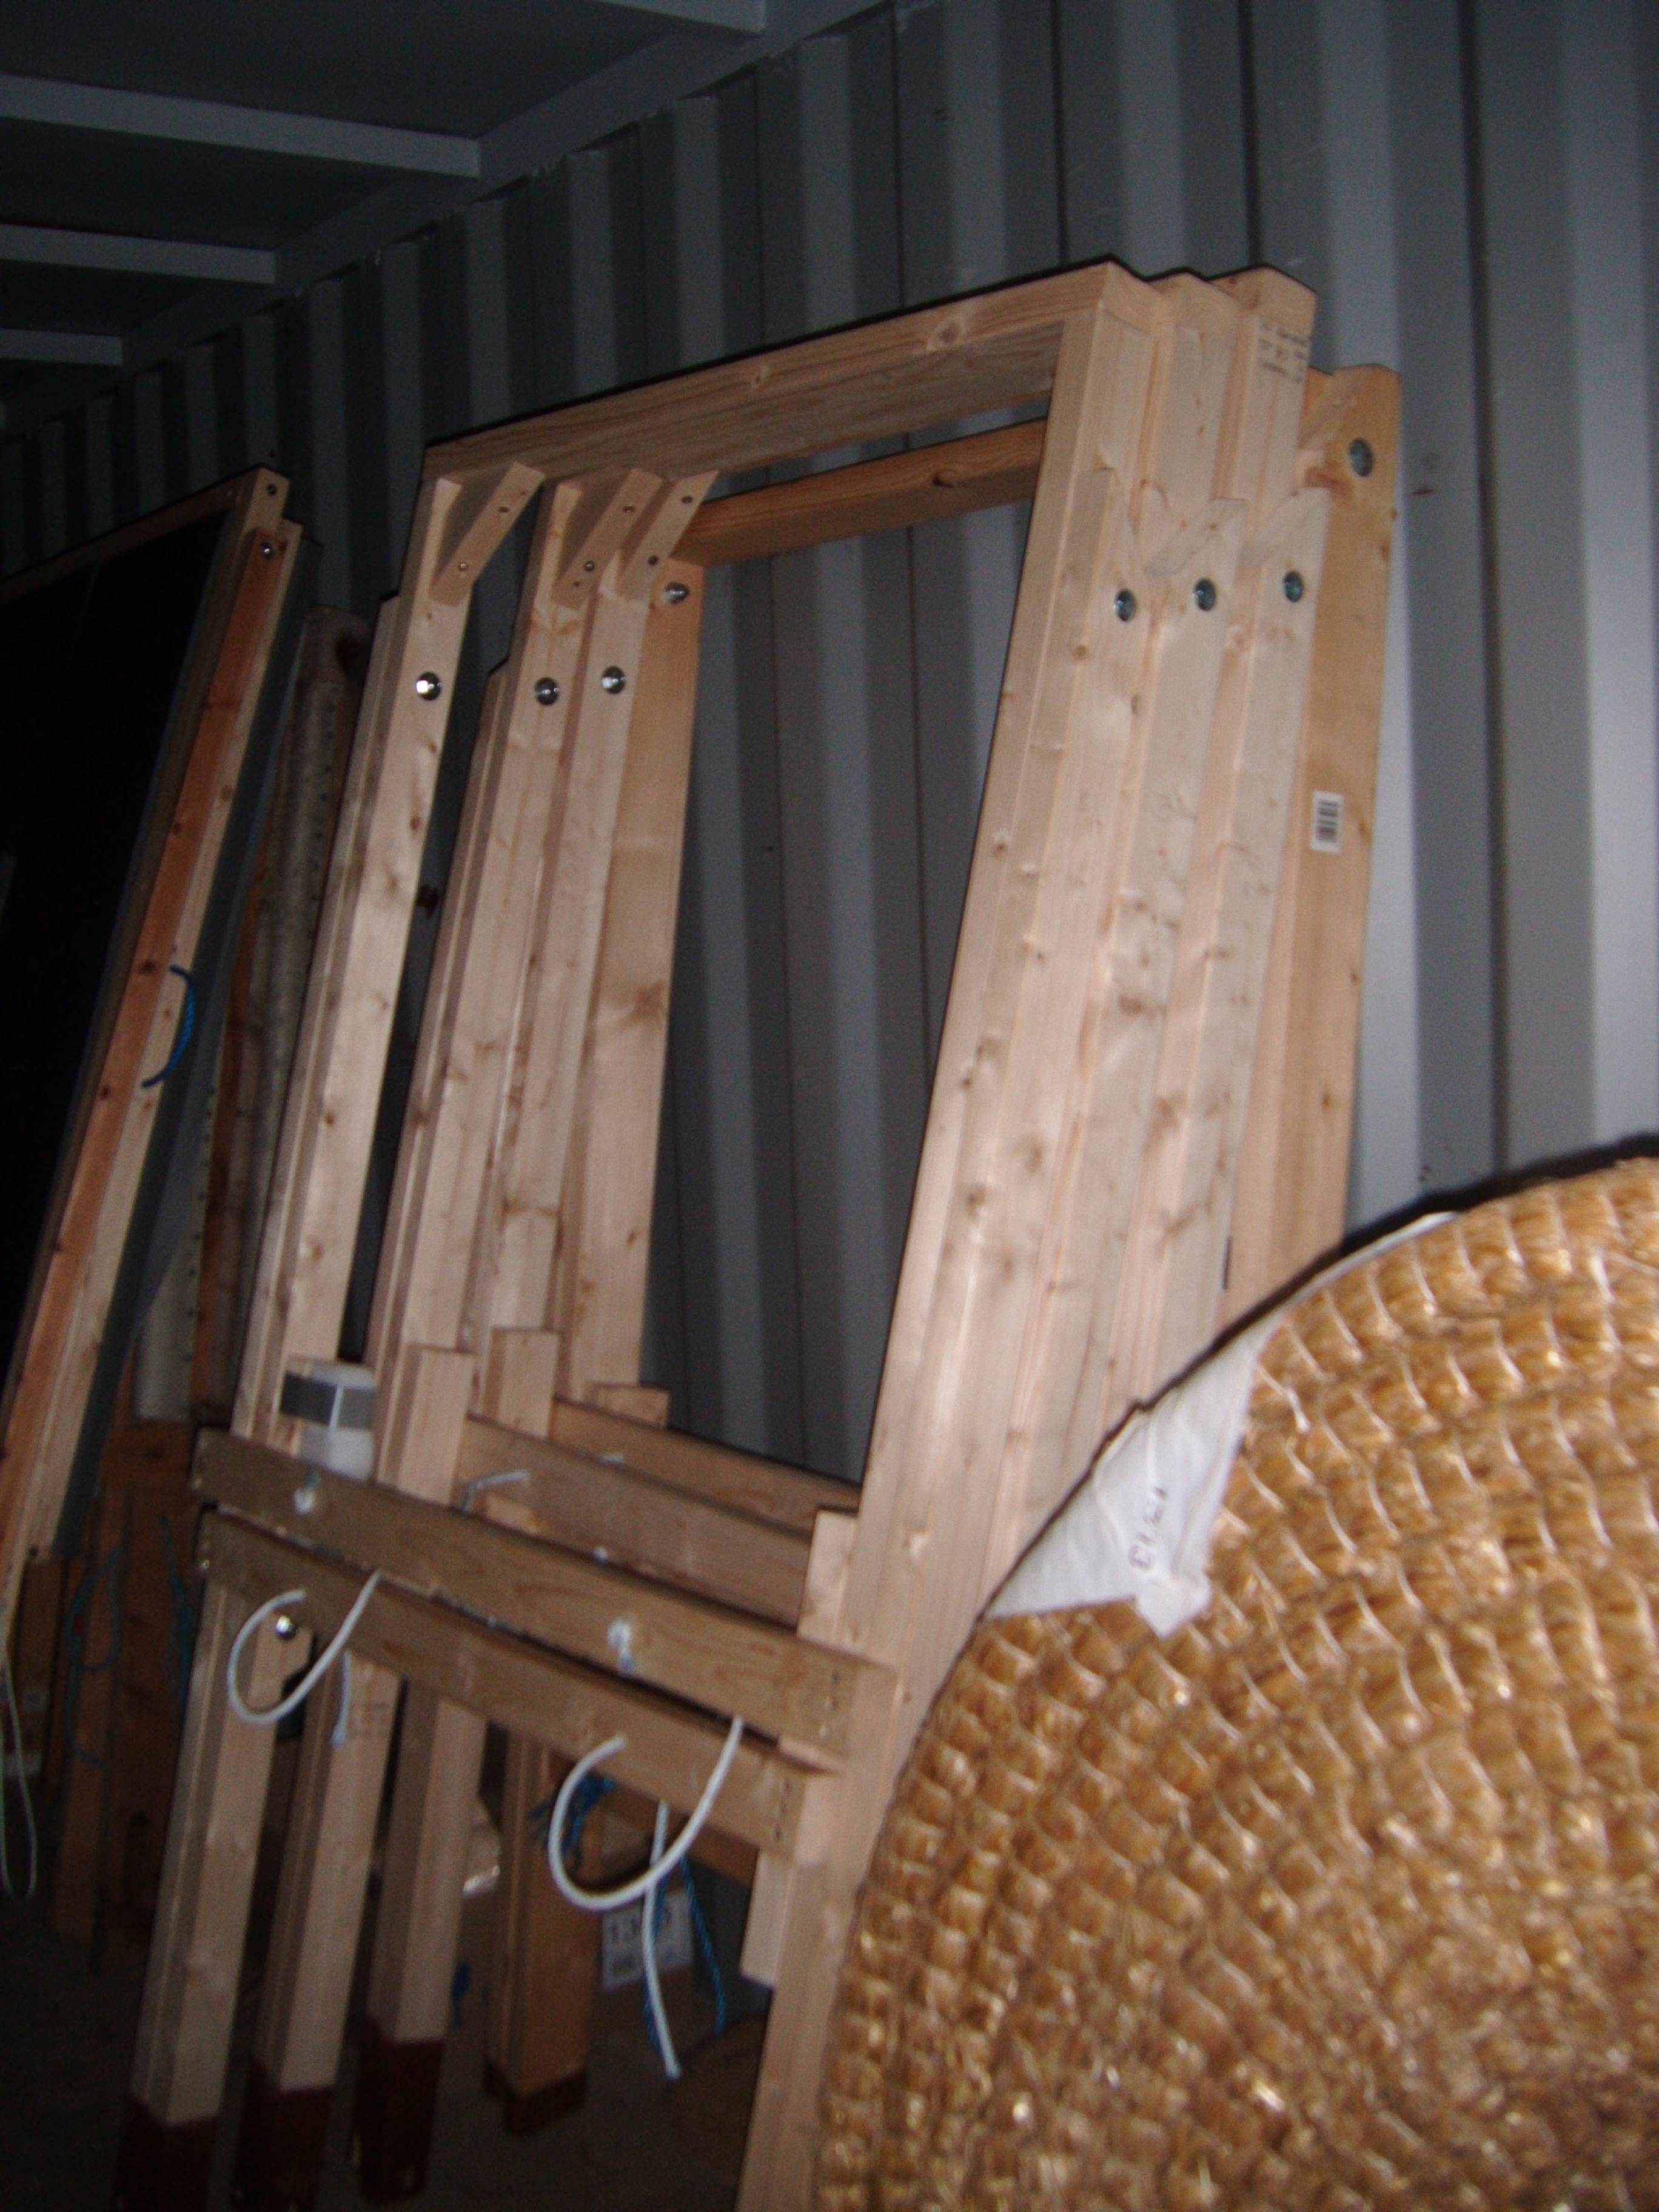

Parts List, per stand
- CLS Timber, 63 x 38mm, 2400mm lengths, qty.6 (5 ½ if making more than one stand.)
(If stands will live outside permanently, use pressure-treated timber, which will usually look slightly green.) - Cup Square Bolts (Coachbolts) 10mm or 12mm x 90mm long, qty.4
- Penny Washers, to fit coachbolts, qty. 8 or 12 with matching fibre/rubber washers if available.
- Lock-nuts, Nylon insert, to fit coachbolts, qty.4
- Wood screws, 6mm x 75mm to 90mm long, qty. 8 - for top bar down into front legs.
- Wood screws, 6mm x 60mm to 90mm long, qty. 8 or 12 - for cross bars into back of legs (check the length if using different timber).
- Cord, rope or webbing; approx 1m but allow a little extra for the knots if using thick rope.
- Optional: Cord, or very thin rope for pin rack; approx 1.5m depending on the thickness.
- Optional: Wood preservative, for bottom of legs if using outdoors.
Notes
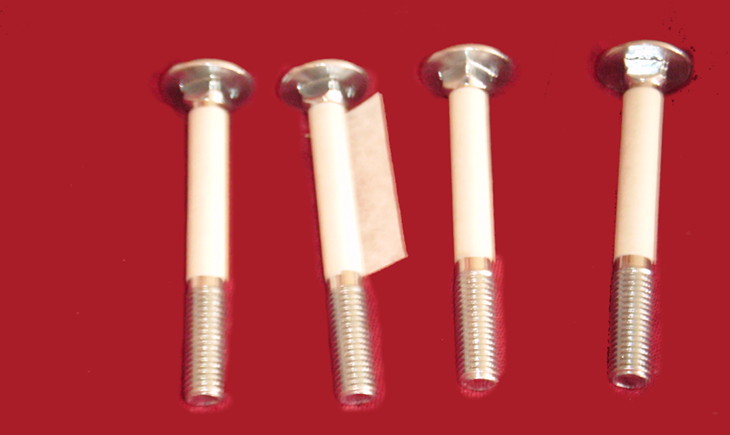
Unless they have a full thread, wrap the shaft of all bolts with approx. four layers of masking tape (approx six inches long), to match or exceed the size of the threads.
Use a fibre washer if possible, or glue two penny washers together, either way, get the widest washer available.
Marking out / construction
- For outdoor use, drill peg holes in all four feet, and dip the feet in an appropriate wood preservative, making sure it fills the peg holes. Leave to dry (typically 24 hours or overnight) while cutting and preparing the remaining parts.
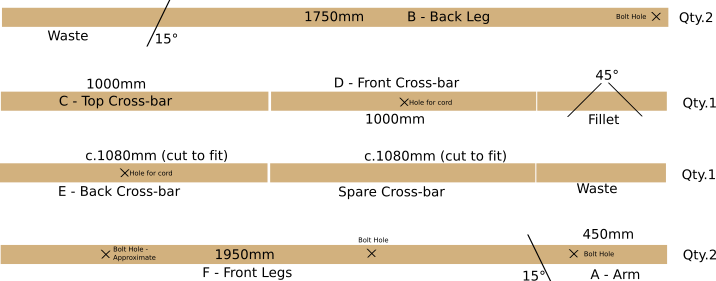
- Measure c. 45mm down from top of back leg - Part B for bolt hole.
- Line up front and back legs (Parts F + B), drill bolt hole through both legs for top pivot.
- Fit coach-bolt/cup-square bolt through top hole on front leg, pointing inwards. A sharp tap with a hammer should settle the 'square' into the timber of the leg. Fit two washers sandwiching a fibre washer, then the back leg - the washers provide clearance for the head of the bolt that holds the arms on. When held upright, the chamfered feet MUST point in opposite directions, double-check that when opened out, the feet sit flat on the floor - from experience, its very easy to get this wrong! Fit a third washer on the inside, and loosely fit a temporary (plain) nut.
- The back legs require a slight chamfer at the top, otherwise the corner will protrude in front of the front legs. (This will probably make more sense when you see the legs standing up.) Stand the legs upright and fully open, and mark the protrusion with a pencil. Dissassemble the legs and saw off the top corner of the back legs, just past the marked line.
- Measure (68mm / 2) + 36 = 70mm (half the depth of your front leg plus the full thickness of the cross-bar) from back end of support arm for a bolt hole. (The rear of the arm must protrude beyond the leg in order to be held by the cross-bar.)
- Fit coach-bolt/cup-square bolt through lower hole on front leg, pointing inwards. Fit two washers sandwiching a fibre washer, then a support arm, long edge uppermost, chamfered edge to rear. Fit third washer, and loosely fit a temporary (plain) nut. NB. The washers are intended to act as spacers between the various parts, fibre or rubber washers help to stop the joints swinging too freely.
- Fit top cross-bar Part C across the top of the front legs, and fit a fillet in the corner that this creates.
- Optionally: Drill a hole in the top cross bar to accept a flag.
- Drill a hole near the centre of the front and rear cross-bars, large enough for the restraining rope to fit through; typically twenty percent larger than the nominal rope thickness, depending on how much the end is frayed.
- Fit the front cross-bar D, behind the front legs, so that it is a tight fit above the support arms - these need a slight upward angle in use or the boss will try to slip forward. If fitted perpendicular to the leg, they will naturally attain a 15 degree angle, but a fraction more is ideal.
- Ensure frame is folded, fit rear cross beam E, circa two inches / 50mm above the position of the front cross-bar - a gap is required for the restraining rope to pass through, and reduces the chance of trapped fingers. Top Tip: use an offcut temporarily placed between the two bars to get them perfectly spaced and parallel.
- Open the stand, and fit a restraining rope. (The photos show stands fitted with two ropes, but one alone is perfectly adequate.) The rope should not be taught, as it is merely a safety feature to prevent the stand accidentally opening too far.
- Both the front and back legs have chamfered feet - double check that these face in opposite directions before fitting locknuts to all bolts.
- All joints are intended to be screwed either from the rear of the stand, or from the top of the stand - this does mean that the length of most of the screws is important, (if using different timber, make sure you use the right length) but dramatically reduces the chance of damaging an arrow through hitting a screw-head.
- Ensure all bolts are tight before use - ideally there should be a fair bit of resistance in each joint, to prevent accidental injury from swinging parts. Re-check and tighten all bolts regularly, typically once or twice a year.
- The Exploded diagram(PDF) may help to explain all of the above.
Finishing Touches
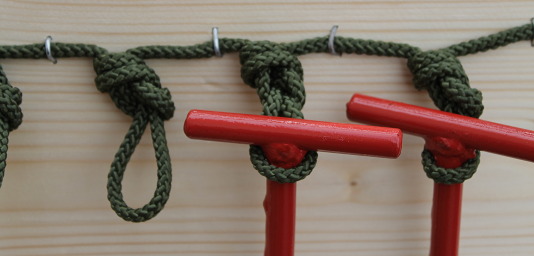
If the stand is to be used outdoors, the pin storage rack shown here is really useful, ensuring that whenever a stand is taken down-field, the necessary pins will automatically be available.
The rack shown above was made from approximately 1.5m of 6mm paracord, but the size is not particularly important.
The knots used are figure-eights, which make a definite loop, which hangs slightly free of the back cross bar, where it is held in place with garden staples.
By allowing the loops to dangle, you will find that even if the stand is carried on its side, the pins will hang down naturally, with no risk of falling out, unlike the more obvious choice of fixed loops or holes drilled in the bar itself.